![[Metroactive Dining]](/dining/gifs/dining468.gif)
[ Dining Index | North Bay | Metroactive Home | Archives ]
Crank It Up
What's better than ice cream? Homemade ice cream!
By Sara Bir
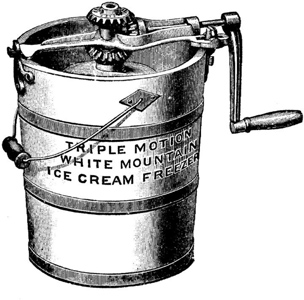
We had a hand-cranked ice cream maker when I was growing up, the kind you pack with ice and rock salt and churn until your arm is numb. That particular ice cream maker, manufactured in 1976, had a blue, plastic exterior and was decorated with white stars and red stripes. I used to stare at the thing in bewilderment, wondering how something as wonderful as ice cream could come from that unassuming contraption. Eventually, we unloaded the ice cream maker at a garage sale. This is to say I grew up eating exclusively commercial ice cream, which is not horrible--a childhood without any ice cream is the real tragedy.
Fresh homemade ice cream is truly a miraculous thing--its flavor more pure, its mouth-feel more true. Ownership of an ice cream maker deems one not a foodie gearhead, but an all-powerful master of the ice cream universe. All you have to do is use the thing, which, considering that it conjures up frosty, churned gold, is deceptively simple. No more midnight runs to the corner store for that emergency pint of Ben & Jerry's! You control the flavor, you control the fat content. Furthermore, ice cream does not need a dozen gimmicky chocolate and caramel stir-ins when it's made with fresh ingredients and a little creativity.
You may harbor happy memories of an old-fashioned, rock-salt behemoth--summertime on grandma's back porch and all that--but the convenience and smaller batch size of newer countertop ice cream makers beats out nostalgia in the practicality department. These "indoor" ice cream makers come in two basic styles: gel canister and self-contained.
Canister models have a hollow metal canister filled with gel. You freeze the canister for about eight hours before making ice cream. Some gel canister models are hand-cranked and must be turned every few minutes; others are electric. Self-contained units have their own freezers, and therefore don't require prefreezing. They tend to be larger, heavier and more expensive.
Buy an ice cream maker that's reliable and easy to use--otherwise, you might not use it at all--but you don't need to drop a c-note to make delicious ice cream. It's possible to find a completely serviceable brand-new ice cream maker for about $40, and if you frequent thrift stores and garage sales, you may be able to pick
up a used unit in like-new condition from a family that's either dieting or whose attention span wanes quickly.
Most ice cream makers have about a quart-and-a-half capacity. I find this to be especially appropriate for a household of two to four ice cream lovers, as the smaller yield allows you to consume realistic portions of ice cream within a few days, while it is still fresh. Larger capacity models require either a Brady Bunch–scale clan of gluttons, or an impossibly active dinner-party schedule.
The real key to great ice cream is the recipe, not the machine. There are two basic types of ice cream: Philadelphia-style and French. Philadelphia-style, which contains primarily cream or cream and milk, is probably the kind most familiar in the universe of homemade ice cream. Because it contains no eggs, it has a refreshing, slightly icy mouth-feel and a clean taste.
French ice cream is made with crème anglaise, a thin, cooked custard with a golden hue from egg yolks. Most commercial ice cream is of the French variety, though it's usually gummed up with thickening agents such as carrageenan or guar gum. Homemade French ice cream, meanwhile,
is incomparably rich and refined.
A lot of cookbooks recommend eating homemade ice cream within two or three days. It's easy to assume that this is bunk, because ice cream can't go bad--it's frozen, right? While homemade ice cream lacks the preservatives present in most commercial ice cream, shelf life is more of a culinary concern than one of health. After a few days, homemade ice cream's flavor loses some of its immediacy and mellows a bit, and the texture of Philadelphia-style ice cream becomes more granulated.
Philadelphia-style ice cream is especially appealing for its ease of preparation--no cooking!--though food scientist Shirley Corriher advises first heating the milk and half-and-half to about 170 degrees, a step that results in smoother ice cream. I've tried this technique, and as far as I can tell, she's right.
Some recipes call for chilling cooked ice cream bases overnight in the refrigerator, but I prefer to cool cooked ice cream bases in an ice bath, which rewards impatience with increased food safety (rapidly lowering the ice cream base's temperature greatly decreases bacterial growth).
If all of these persnickety tips for the perfect ice cream come across as intimidating, remember that homemade ice cream is similar to homemade bread in that even when you mess it up, it still beats out its commercial counterpart 100 percent. An avalanche of Häagen-Dazs can't compare to one scoop of the good stuff.
Chipping Away at Chocolate Chunks
Chocolate manufacturers temper chocolate so that when solid, it's shiny and breaks with a clean snap. The problem is that when frozen, tempered chocolate becomes gritty, hard and, well, frozen. Most commercial ice cream manufacturers purchase chocolate that's specially formulated for ice cream so that it melts in your mouth along with the ice cream itself.
When making ice cream at home, it's easy to stir a handful of chocolate chips in right at the end of the freezing process, but the result will be crumbly, chalky chocolate. To avoid this, chocolate expert and cookbook author Alice Medrich recommends melting the chocolate and freezing it. "Melting destroys the chocolate's temper and diminishes its ability to harden except when chilled," she writes in her book Bittersweet. So to optimize the flavor of high-quality chocolate, all you need to do is melt it, pour it onto a parchment-lined tray and freeze until firm before chopping it into chunks. About four ounces of chocolate will generously stud a one-quart ice cream recipe with chocolatey goodness.
Burnt-sugar cakes and frostings, popular in mid-20th-century cookbooks, have a subtle but complex flavor that inspired this refreshing Philadelphia-style ice cream. It pairs excellently with hot fudge topping, cacao nibs or ripe sliced peaches. Heating the milk helps to make a smoother ice cream. Be careful not to let the caramel get too dark, because the ice cream will taste charred.
2/3 c. granulated sugar
Combine sugar and 1/3 cup water in a deep, heavy-bottomed 2-quart saucepan. Cover with a tight-fitting
lid and bring to a boil over high heat. Meanwhile,
combine the cream and milk in another saucepan and heat over medium-low heat. Keep the milk mixture just below a simmer.
Boil the sugar syrup, covered, for 1 minute before removing lid. Continue boiling sugar syrup over high heat until syrup turns a medium amber, about the color of clover honey (once the sugar begins to caramelize, it can burn quickly, so keep a good eye on it). Remove the pan from heat.
Once the caramel is the desired color, quickly add about 1/2 cup of the scalded milk-cream mixture (the caramel will froth up, so be careful not to add too much, or it may boil over). Return the pan to medium heat and slowly add the remaining milk-cream mixture. Cook, whisking constantly, until the caramel is dissolved. Remove from heat and stir in salt and vanilla.
Prepare an ice bath by filling a large bowl with ice water and setting another bowl on top. Pour the cooked ice cream base into the empty smaller bowl and stir occasionally until cool. Freeze in an ice cream maker according to manufacturer's directions.
Makes approximately 1 quart.
[ North Bay | Metroactive Central | Archives ]
Copyright © 2005 Metro Publishing Inc. Maintained by Boulevards New Media.
![]()

Cool: Today's ice cream makers are silent and swift, unlike the hand-cranked monstrosities of yore.

Burnt Sugar Ice Cream
1 c. heavy cream
2 c. whole milk
pinch salt
1 tsp. vanilla extract
From the August 17-23, 2005 issue of the North Bay Bohemian.